eSIM Setup Guide
Install your Vell eSIM
Follow these steps to install your Vell eSIM profile.
This video demonstrates the complete iPhone installation and activation flow.
Step 1 of 9 — Installation
Open Settings
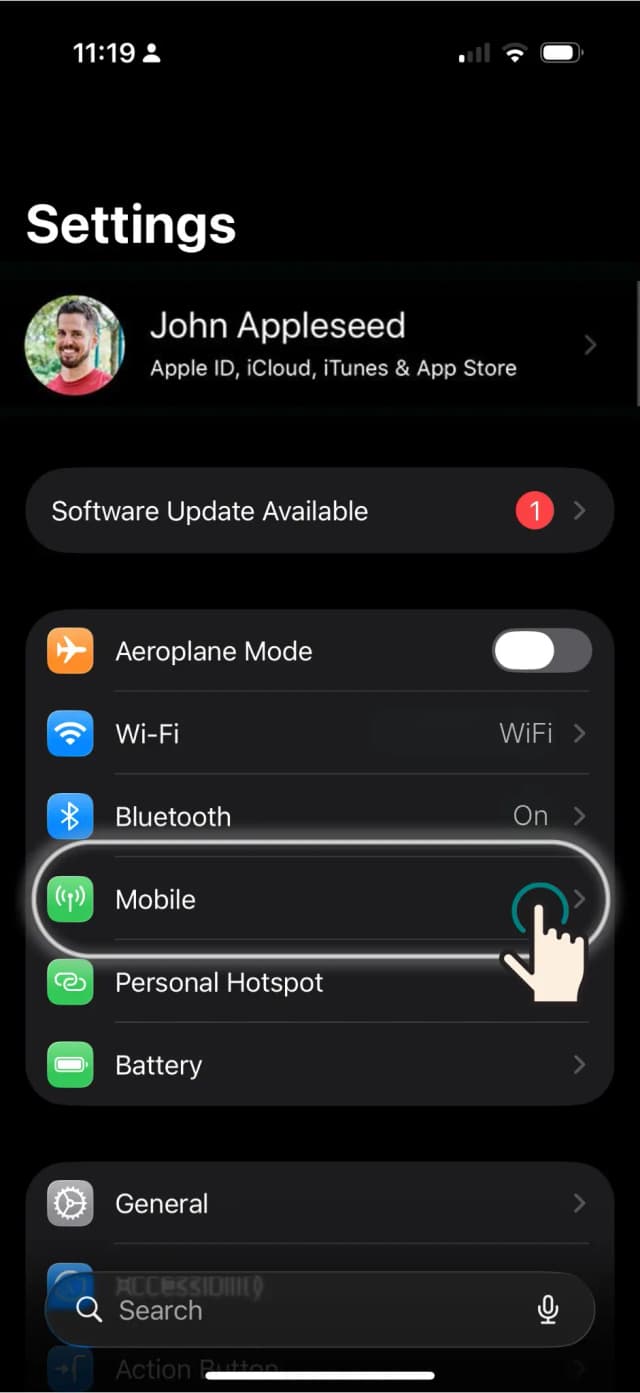


Open the Settings app on your iPhone and tap Mobile (or Cellular). This is where all SIM management lives.
Note
Connect to Wi-Fi first — the eSIM profile is downloaded over the internet.
Scroll to the bottom of the Mobile screen and tap Add eSIM to open the eSIM setup wizard.
Note
If Add eSIM isn't visible, your device may not support eSIM or it's carrier-locked.
On the Set Up eSIM screen tap Use QR Code. Your camera opens ready to scan the code your activation QR code.
Note
keep your email open on another device to access the QR code.
Hold your iPhone steady over the Vell QR code. It's recognised automatically — no button press needed.
Note
If scanning fails, tap Enter Details Manually at the bottom of the screen.
If QR isn’t available, manually input the SM-DP+ address and activation code. These are in your Vell order confirmation email. Tap Next when done.
Note
It's helpful to copy-paste — the code is long and case-sensitive.
Tap on the new eSIM entry that appears after scanning or manual entry. Then tap Mobile Plan Label to name your eSIM.
Note
A clear label like 'VELL eSIM' makes it easy to find later in Settings.
Choose a preset or tap Edit custom label to type your own.
Note
A clear custom label like 'VELL eSIM' makes it easy to find later in Settings.
Type a custom label for your eSIM, for example 'VELL eSIM' or 'VELL Japan'. Tap Done to save.
Note
A clear custom label like 'VELL eSIM' makes it easy to find later in Settings.
Please proceed to the activation steps to turn on your eSIM and connect to the network.
Note
Your eSIM is installed but not active yet — you need to enable it in the next steps.